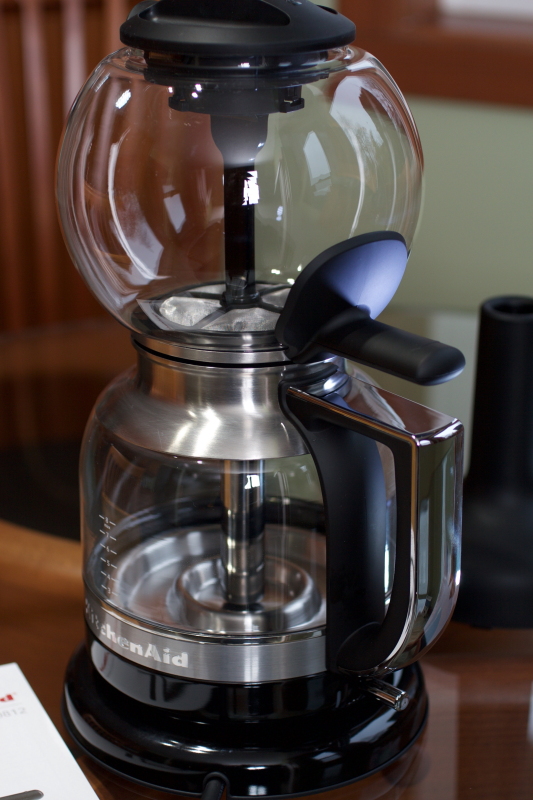
For the average coffee drinker, the first glance at a vacuum brewer, any vacuum brewer - whether it is a bunsen burner powered, gas flame or electric unit - can elicit one of several responses: gasps of awe, feelings of anxiety, or an overwhelming sense of confusion.
So it was with great delight that I took home a loaner Kitchen Aid automatic vacuum brewer system from the good folks at Capital Iron in Victoria B.C. Canada. They have pretty much opened up their entire coffee inventory for me to explore - good for me, great for my readers.
First off let's talk about what the vacuum brewer is with a little science help from a wiki-pedia page - and be warned, there is some yawn inducing science stuff here.
A vacuum coffee maker brews coffee using two chambers where vapor pressure and vacuum produce brewed coffee.
This type of coffee maker is also known as vac pot, siphon or syphon coffee maker, and was invented by Loeff of Berlin in the 1830s.
These devices have been in use for more than a 150 years and are a popular choice amongst purists for the quality of the extraction and the clarity of the brewed cup. 
How does it work? A vacuum coffee maker operates as a siphon, where (a.) heating and (b.) cooling the lower vessel changes the vapor pressure of water in the lower, first pushing the water up into the upper vessel, then allowing the water to fall back down into the lower vessel.
More verbosely: the principle of a vacuum coffee maker is to heat water in the lower vessel of the brewer until expansion forces the contents through a narrow tube into an upper vessel containing ground coffee (as water temperature increases, dense liquid water increasingly converts to less dense water vapor gas, which takes up more space and thus increases pressure); when the water reaches and exceeds the boiling point (so the vapor pressure equals and then exceeds atmospheric pressure), the (water vapor) pressure in the lower vessel exceeds the (atmospheric) pressure in the top vessel and water is pushed up the siphon tube into the upper vessel. This is a very technical explanation of what is happening with a vacuum brewer but it is important to know that two, not one, principles are at work. Importantly, at no time is boiled or boiling water coming in contact with the brewed or brewing coffee.
Note that siphons work by pushing the water (under pressure – not under tension), and it is the changing vapor pressure in the lower vessel, combined with the constant atmospheric pressure in the upper vessel (it's exposed to open air after all) that drive the siphon. When the water cools the pressure in the lower vessel drops as steam condenses into dense water, taking up less volume and hence dropping the pressure. This creates a partial vacuum, causing the atmospheric pressure outside the container (along with gravity) to force the liquid back into the lower vessel. Voila! Brewed coffee!

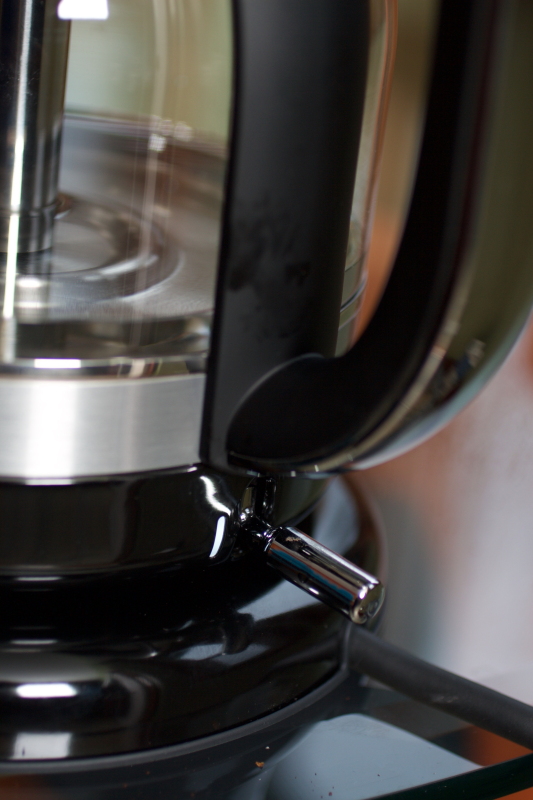
The Kitchen Aid auto vacuum brewer has one switch to flip. That is it.
Photo Left - There's that one switch you get to play with.
Turn it on and sit back while the water is heated. When the water reaches the critical temperature, the small amount of pressure in the lower vessel pushes the water into the upper chamber or vessel where the ground coffee is. The hot water and coffee mix. At this point you could give the water and coffee a single stir with a small wooden spoon. There are some good videos of this process and I will link to one.
The Kitchen Aid Vacuum brewer, by design, automatically turns the power to the heating element off at the ideal time completing the brew cycle.
Picture lower right - The Kitchen Aid Vacuum brewer comes with a stand for the upper brewing vessel. After you brew and unlock the upper and lower vessels, this is where you put the upper vessel to catch the drips!
The Quick Step By Step.
A.) Measure the amount of water that you will need for the desired amount of coffee. I use a coarser than drip grind but you should experiment. I also use a 15-to-1 water/coffee ratio but the guidelines within the manual for scoop coffee/water ratio seem to follow the Speciality Coffee Association of America guidelines. This is one of the first times that I have ever seen the SCAA mentioned in a mainstream manufacturer of coffee equipment!
B.) Lock the upper vessel to the lower vessel. Read the manual carefully and understand how this works. The Kitchen Aid Vacuum brewer uses a nifty magnetic lock - great idea, and makes it easier to separate at the end of the brew cycle.
C.) Flip the switch, stand back and watch. The vacuum brewer produces the hottest possible coffee just short of "scorched". This is mind, the vacuum brewer can produce a quantity of hot coffee that can scald and even kill. If you don't believe me, it's in the warnings included with the manual.
Impressions. Personally, brewing coffee that is at the upper range of heat is not really my thing - but for those that "like it hot" this is truly the only game in town. But do yourself a favor out of the gate. Brew your first pot, pour your coffee into an unheated mug and let it sit a minute or two before you engage your lips to the cup. You have been warned.
I liked the Kitchen Aid vacuum brewer. It is well built and comes with a price tag approaching $300 (Canadian). It is about as close to a fuss free vacuum coffee experience as you can have. All the flavor and drama of a flame powered vacuum brewer, but electric with only one switch required. As stated earlier, it is self timing and triggers its own brew sequence completion. As always, I stress that people understand what is happening, the hazards of scalding hot liquids and the importance of several good read throughs of the manual.
Taste tests - Depending on the choice of filter used, your brewed coffee can taste like a perfectly brewed pot of French press with all its inherent muddiness or "chewy" mouth texture. You can use cloth or paper filters for some of the most extraordinary fine filtered results. You may wonder: "What does the actual vacuum process have to do with the brew? Does it affect some quality or result on the brew?" The straight answer is no and that might come as a surprise. For all the magic of the vacuum brewer and its use of "pressure vessels" and vacuum, these things have nothing to do with the taste of the brewed coffee. The design of the vacuum brewer facilitates a brewing process, in this case immersion brewing, but neither adds nor detracts from the complete process.
YouTube Video - here is a link to the Kitchen-Aid 2 minute preview of the vacuum brewer.
Extra reading - I reviewed the "Plastic" Bodum vacuum brewer over a decade ago - it is worth a read if only for an alternate perspective on the same principle.
For some reading on more of a molecular level with way more granularity than this article, head over here to B.A. Harris's wesbite - it features a staggering amount of detail.
Many thanks to Alisa Wiebe of Capital Iron, Victoria for the loaner of the Kitchen Aid Vacuum brewer and to Kitchen-Aid Canada for all their neat products.
Colin Newell is a Victoria resident and coffee lover who has been writing about coffee culture and gear since 1995! His work has been featured in dozens of newspapers, on syndicated CBC radio, CTV Newsworld Express, CBS Television and the Oprah Network.
